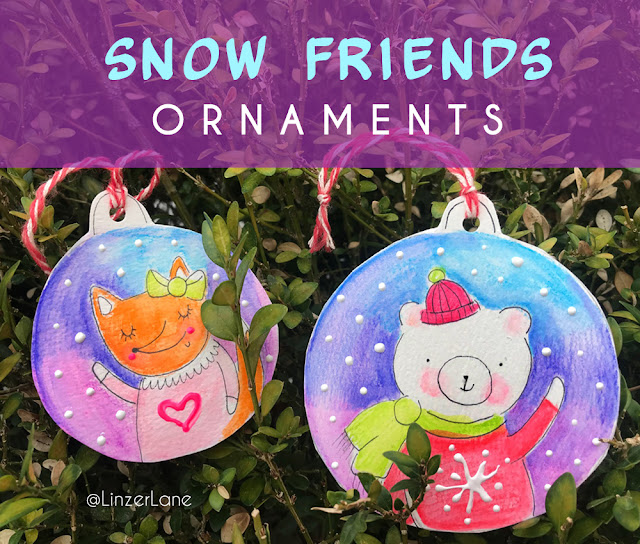
These sweet ornaments are something I've been making for years - but every time I make them - I add a little twist! :)
I've always been a fan of watercolors - even years ago before they became the primary medium for my children's book illustrations.
In order to make these sweet Snow Friends Ornaments, you will need:
- a pencil, permanent marker (thin tipped), eraser, scissors
- paint brushes
- hole puncher
- string
- a mug or glass to trace
Trace around the rim of a mug or glass with a pencil in order to make a perfect circle. Add a little handdrawn loop on the top as the 'cap' for the ornament.
Next, add a cute character inside your holiday ornament. Polar bears and foxes are a great choice for the holidays - and are somewhat easy to draw, as you only need the 'bust' or top half of the animal.
Trace around your pencil drawing with permanent pen and erase the pencil lines.
Next, comes the really fun part! Add some color using watercolor pencils. I love these colored watercolor pencils from OOLY because they offer a wide variety of colors, and it's easy to get precision within your artwork when using them.
The concept pictured above is to use three similar colors blended together to achieve a stormy winter background.
After you're happy with your fully colored ornament, add some dimension with what I like to call 'puff paint'! OOLY's Dot-A-Lot neon colors are perfect for adding 'snow' and sweater embellishments to these sweet characters.
(This step was the 'twist' I tried this year ;) )
After your art is completely dry, cut it out and add a hole and string for hanging on the tree!
As always, I hope you enjoy the ideas on this blog, and would love to see your creations on social media! Don't forget to tag @LinzerLane and @weareooly if you do decide to try out these sweet ornaments!
x


No comments:
Post a Comment